Imagine you are a detective, and your job is to find all the sneaky little problems hiding in a brand new car before it rolls out of the factory. You wouldn't just give the car a quick once over and call it good. You'd have a very specific, step by step process. You'd check the engine, the brakes, the electronics, and the paint job. You'd probably even take it for a test drive on a bumpy road to see what happens.
The Software Testing Life Cycle, or STLC, is that very specific, step by step process for software. It's not just a single activity you do at the end of development. It's a structured sequence of carefully planned activities that ensure a software product meets all its requirements and is free of errors. The STLC is the quality control blueprint for every software project.
Why Bother with a Testing Life Cycle?
You might be thinking, "Can't we just test the software whenever we feel like it?" You could, but that would be like trying to bake a cake without following a recipe. You might end up with something that looks like a cake, but it probably won't taste very good.
A structured STLC brings a world of benefits:
Clarity and Consistency: It ensures that every team member knows exactly what needs to be tested, how it will be tested, and when.
Efficiency: By planning ahead, you avoid wasting time and resources on redundant or unplanned testing.
Increased Quality: Following a methodical approach helps you find more bugs earlier in the development process, when they are easier and cheaper to fix.
Traceability: It provides a clear record of all testing activities, which is vital for compliance and future maintenance.
The STLC is often integrated into the broader Software Development Life Cycle (SDLC). While the SDLC focuses on building the entire product, the STLC is the quality assurance part of that bigger picture.
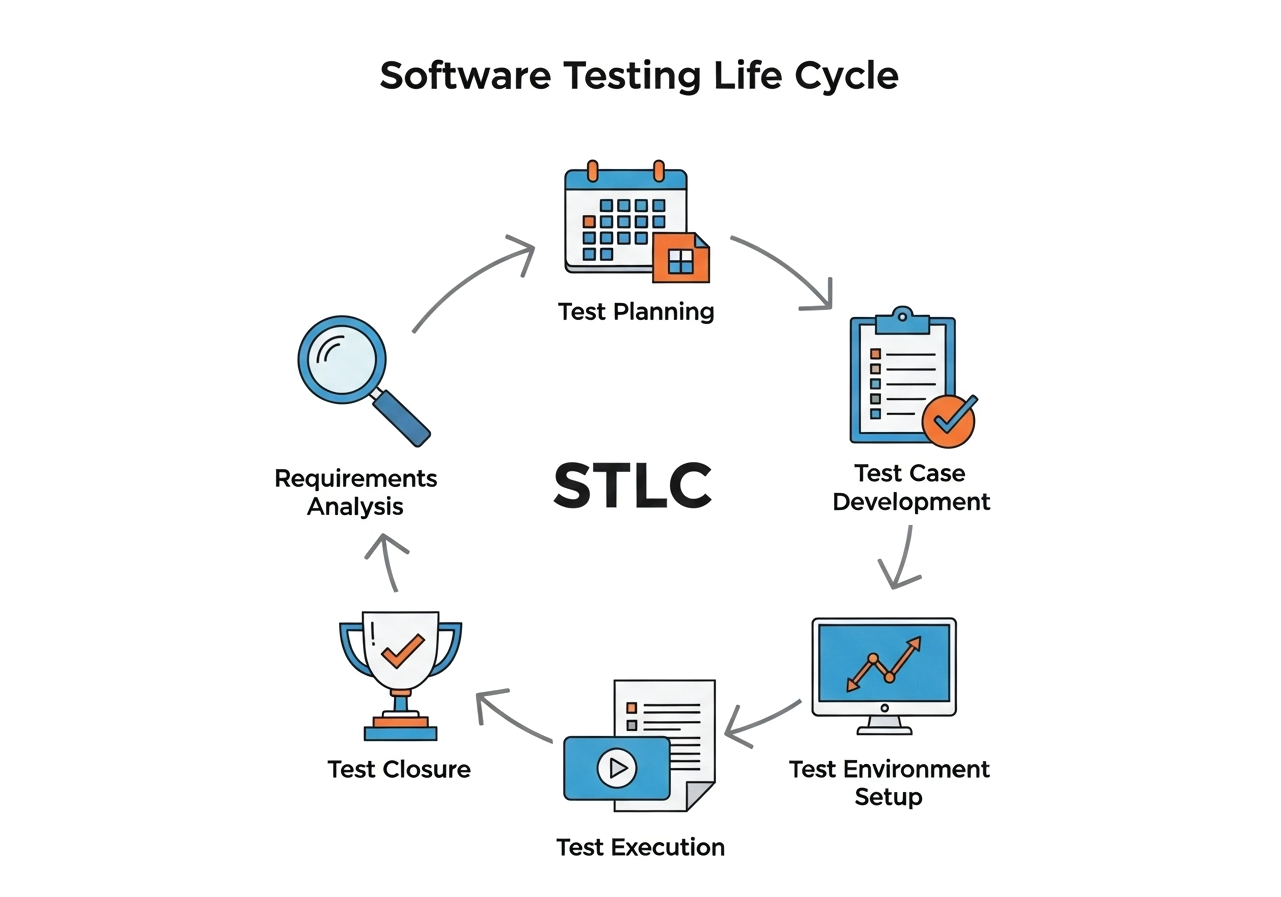
The Journey of a Tester: The STLC Phases
Licensed by Preparesh
The STLC is typically broken down into six main phases. Think of each phase as a chapter in our detective story, each with its own goals and activities.
Phase 1: Requirements Analysis
Before you can test anything, you need to understand what you're testing. In this first phase, the testing team, often led by a Test Lead, dives deep into the software's requirements. They study the functional and non functional requirements to understand what the software is supposed to do.
The main activity here is creating the Requirements Traceability Matrix (RTM). The RTM is a document that maps out each requirement to a specific test case. It's a way of making sure that every single feature and function has been accounted for and will be tested.
Example: Imagine we are testing a new online banking application. In this phase, we would carefully read the documents that say things like: "Users must be able to log in with a username and password" and "Users must be able to transfer money between accounts." The testing team would identify any ambiguous or missing requirements and get clarification from the business team. This is about asking questions like, "What should happen if a user enters the wrong password three times?"
Phase 2: Test Planning
This is the big picture strategy phase. The test team's leaders create a comprehensive test plan document. This document is like a project plan for the entire testing effort.
What goes into the test plan?
Scope: What will be tested and what will not be tested?
Strategy: What types of testing will we perform (e.g., performance testing, security testing)?
Resources: Who will be on the team? What tools will we use?
Timeline: When will each testing activity happen?
Exit Criteria: What conditions must be met for us to consider the testing complete?
Example: For our banking app, the test plan would outline that we'll perform a type of testing called security testing to make sure user data is safe. It would also specify that the team will consist of two manual testers and one automation engineer. The plan would also state that we'll need to use a specific test management tool to track our progress.
Phase 3: Test Case Development
With the plan in place, it's time to write the specific instructions for our testing. This phase involves creating detailed test cases, which are step by step instructions that a tester will follow to validate a specific feature.
A good test case includes:
Test Case ID: A unique identifier.
Test Case Title: A brief, descriptive name.
Preconditions: What needs to be true before you can run the test?
Test Steps: The actions a tester needs to take.
Expected Result: What is the correct outcome?
Example: For the banking app's login feature, a test case might look like this:
Title: Validate Login with Correct Credentials
Preconditions: A valid user account exists.
Steps:
Navigate to the login page.
Enter a valid username.
Enter a valid password.
Click the "Log In" button.
Expected Result: The user is successfully logged into their account and is redirected to the dashboard.
This phase also involves creating test scripts for automated testing.
Phase 4: Test Environment Setup
This is where we get the sandbox ready. The test environment is the hardware and software configuration where the testing will be performed. It's crucial that this environment is as close as possible to the real world production environment where the final software will be used.
Activities include:
Installing: Setting up the necessary hardware and software.
Configuring: Making sure the network, database, and other components are correctly configured.
Data Preparation: Creating test data that will be used during the testing process.
Example: For our banking app, we would set up a test server, install the application on it, and create some dummy user accounts with some fake money in them. This ensures that we can perform our tests without affecting any real customer data.
Phase 5: Test Execution
This is the "go time" phase. The testers now execute the test cases they developed in Phase 3, following the instructions step by step. As they execute each test, they compare the actual result to the expected result.
What happens if the results don't match? A bug is found! The tester logs the bug in a bug tracking system. A good bug report includes a clear title, a description of the bug, the steps to reproduce it, and any relevant screenshots or logs.
Example: A tester runs the login test case we created. They enter the correct credentials and click log in, but instead of seeing the dashboard, they get an error message. The tester then takes a screenshot of the error, writes up a detailed bug report, and assigns it to a developer to fix.
Phase 6: Test Closure
After all the testing is complete and the software is ready for release, we enter the final phase. This is about summarizing the entire testing effort and learning from the experience.
Activities in this phase include:
Reporting: A final test report is created. It includes a summary of the testing activities, the number of bugs found and fixed, and an overall assessment of the product's quality.
Retrospection: The team gets together to discuss what went well and what could be improved for the next project.
Archiving: All the test artifacts, including test cases, test data, and bug reports, are stored for future reference.
Example: The testing team for our banking app would create a report that shows they executed 150 test cases and found 25 bugs, all of which were fixed. They would then meet to discuss how they could have found one of the major bugs earlier in the process.
Who's Who in the Testing World?
The STLC is a team effort. Here's a quick look at some of the key roles:
Test Lead or Manager: The captain of the ship. They're responsible for the overall test plan, strategy, and managing the team.
Test Engineer or Tester: The foot soldiers. They write test cases, execute tests, and report bugs.
Automation Engineer: The wizards of efficiency. They write automated scripts to run repetitive tests.
A Tester's Wisdom: Best Practices and Pitfalls
Best Practices
Start Testing Early: Don't wait until the end to start. Get involved in the requirements and design phases to catch problems before they become costly to fix. This is often called "shifting left."
Automate Wisely: Not every test should be automated. Focus on tests that are repetitive, stable, and time consuming.
Keep Communication Open: Testers, developers, and project managers should communicate constantly. This prevents misunderstandings and makes the process much smoother.
Pitfalls to Avoid
Rushing the Plan: A poor test plan can lead to an ineffective and chaotic testing process. Take the time to plan properly.
Skipping Documentation: If you don't document your test cases and bugs, it becomes impossible to track your progress or reproduce issues.
Assuming Perfection: Never assume the software is bug free. Testing is a process of proving that the software works, not just hoping it does.
The STLC is a powerful tool. When used correctly, it helps teams build robust, reliable, and high quality software. By following these structured steps, you are not just testing a product; you are building confidence in the software you deliver.